Apple Studio Display Renamer
I use two Apple Studio Displays in my office. The one annoyance since day one: picking the right one for audio.
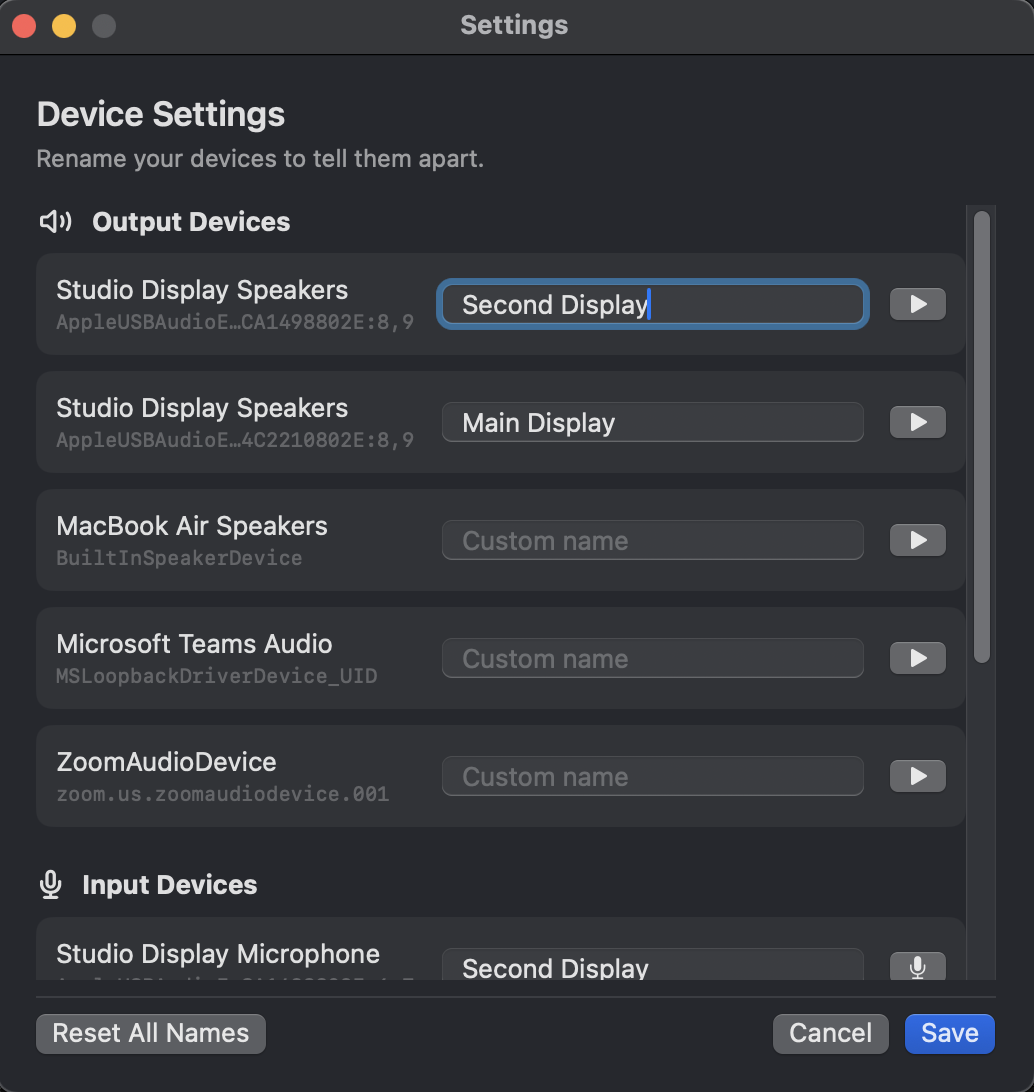
In the macOS audio dropdown they’re both just “Studio Display Speakers” and “Studio Display Microphone.” Apple doesn’t give you a way to rename them, so I’m guessing every time I dock my MacBook Pro or hop on a call.
I built a small menu bar utility that lets me rename them, save preferred input/output pairs, and test audio.
Studio Display Renamer
github.com/jbmartino/studio-display-renamer
How it works
Each Apple Studio Display has a unique hardware serial embedded in its CoreAudio UID (e.g., A1498802E vs C2210802E). The app uses these to tell identically named devices apart and automatically pairs each speaker with its corresponding microphone.
For built-in devices like MacBook Pro speakers/mic and virtual devices like Microsoft Teams Audio, pairing is done by matching the device name after stripping suffixes like “Speakers” and “Microphone.”
Old Design
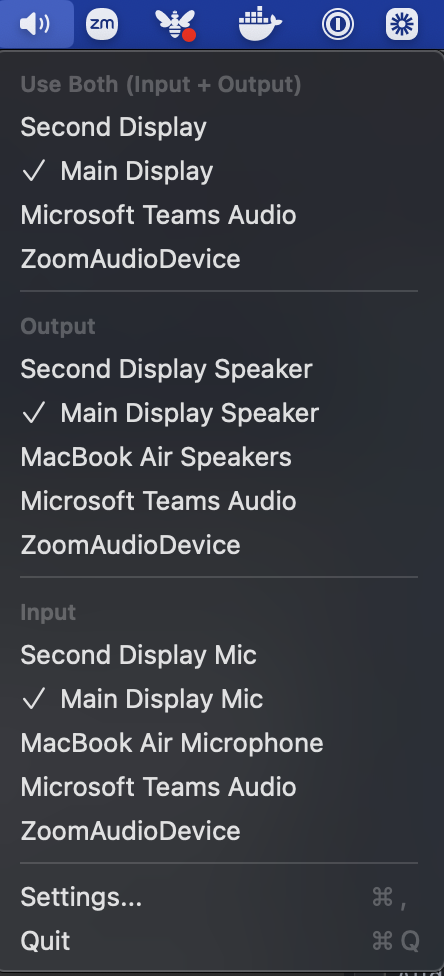
The first version used two separate views: a native macOS dropdown menu for switching devices, and a standalone settings window for renaming and testing them.
It worked, but flipping between two windows felt clunky. Around this time I saw Simon Willison’s post on vibe coding SwiftUI apps where he built Bandwidther, a network monitor that uses an NSPopover anchored to the menu bar icon. One panel, everything in view.
I took some inspiration from that. The original used SwiftUI’s MenuBarExtra with .menuBarExtraStyle(.menu), which renders a standard macOS menu. Native and clean, but limited to simple items like text and checkmarks. No room for text fields, level meters, or a two-column layout.
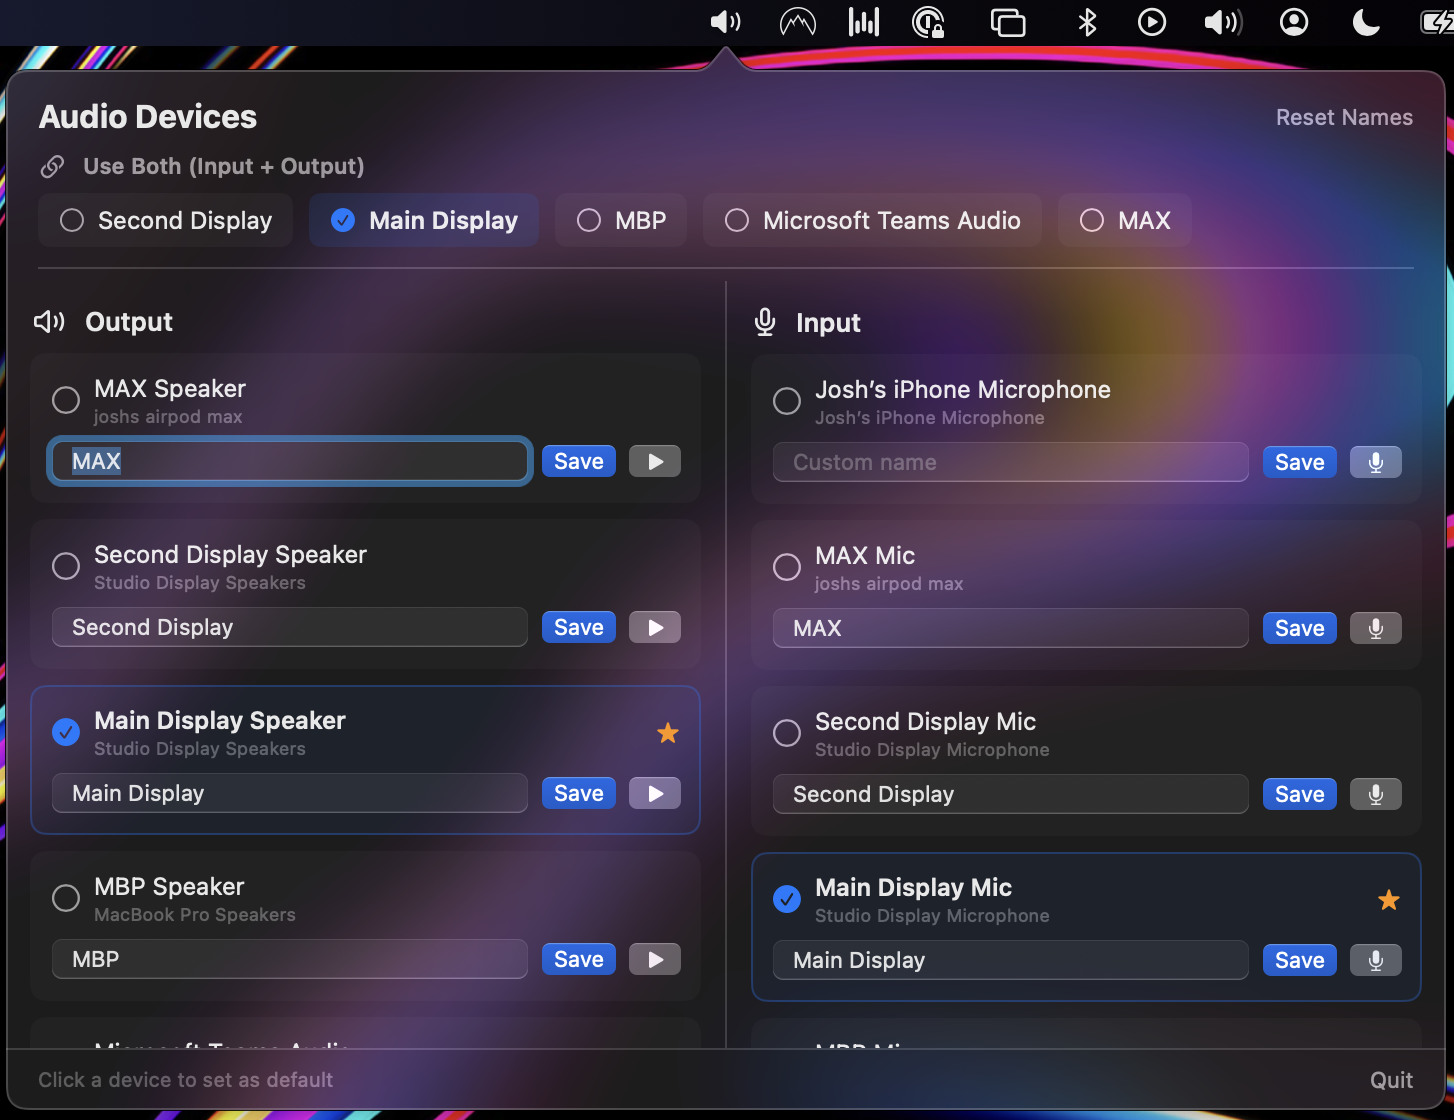
Switching to NSPopover with a full SwiftUI view inside let me put everything in one place: outputs on the left, inputs on the right, a “Use Both” row at the top for paired devices, inline renaming with a save button, and test controls for speakers and mics. No more settings window.
I also redid the test sound. The original temporarily switched the system default output, played the macOS “Ping” sound, then switched it back. Slow and disruptive. Now it synthesizes a short two-tone chime using AVAudioEngine and routes it directly to the target device without touching the system default.
Source
Full source is on GitHub.
Grab the dmg to install like any normal macOS app from Releases.
If you found this utility helpful, support me here: